How To Delete Facebook Pixel?

- Delete Facebook Pixel from Business Manager
- Remove Facebook Pixel from your Website
- Delete Facebook Pixel in Google Tag Manager
- Delete the Facebook Pixel from your source code
- Wrap-up
The Facebook Pixel can help you track user engagement and conversion on your website. You want the code on your website for a variety of reasons. However, there are numerous reasons why you might wish to use Facebook pixel from your website and from your Facebook Business Manager entirely.
Facebook Pixel may be installed and pasted onto your website to track all user behaviors, including making purchases, among other things. Additionally, you will get a wealth of relevant data about their location, the devices they are using to visit your website, and other details like their age, gender, etc. So, it’s simple for you to understand what consumers often do after seeing your ads.
Your Facebook ads will be seen by those who are looking to buy your goods or services with the aid of Facebook Pixel. More than that, it helps advertisers create focused audiences and unlocks a variety of previously locked advertising capabilities on Facebook.
Delete Facebook Pixel from Business Manager
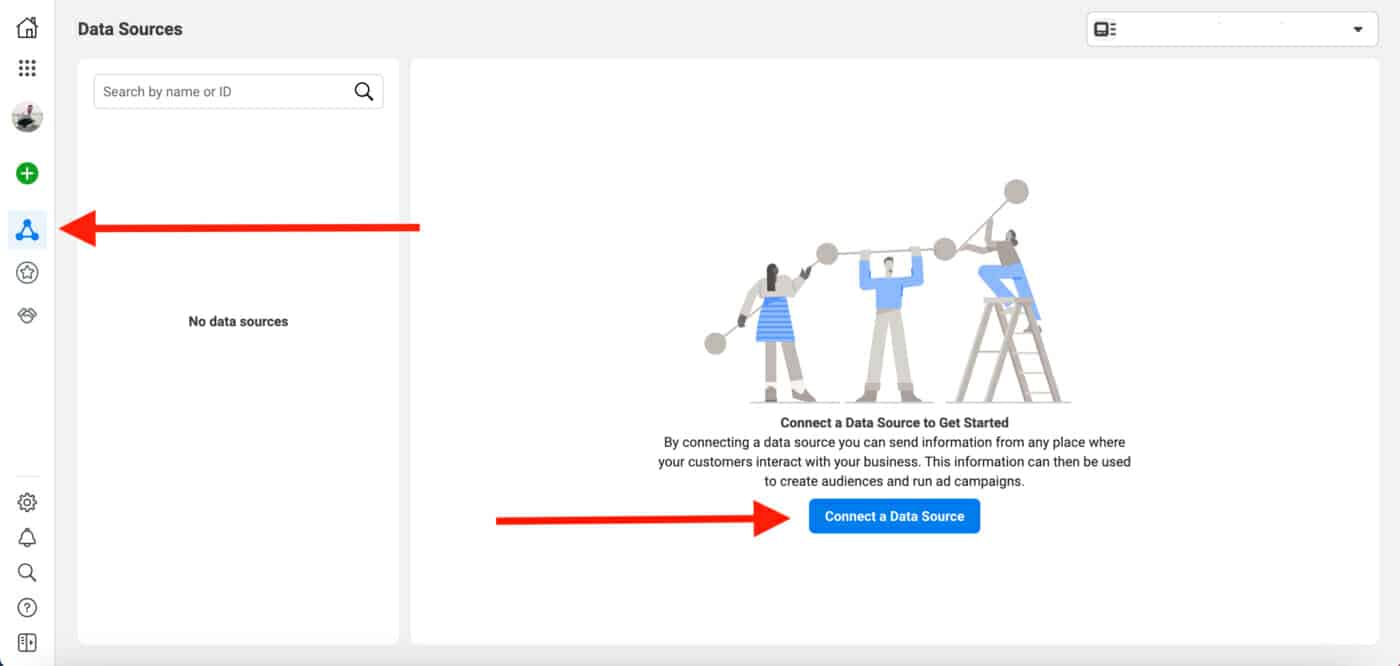
There are two methods to delete Facebook Pixel: You are being removed from your Facebook ads account. The pixel will be invisible in the list of pixels available when uploading an ad in the advertising manager this way. Another approach is to remove the Pixel code from your page. If you use a platform like Wix, Shopify, or another to inject the code, you merely need to type the Pixel’s number in the dedicated spot in your site’s dashboard.
When you complete removing Pixel from your site, you may be perplexed to find it in the Facebook Ads Manager. Don’t worry, this does not imply that Pixel is still active on your website. Pixel is not enabled on your website. It is visible but inactive; it cannot track visitor activity or provide any analytics for your ads or website.
Phase 1: Go to the Business Settings Menu
The first step to delete Facebook Pixel is to go to your Facebook Business Manager and then select Business Settings.
Phase 2: Launch Pixels
Then, on the left side of the screen, pick Data Sources. There will be a Pixels button underneath, so click it.
Phase 3: Choose The Pixels You Wish To Use
The Pixels section displays a list of pixels in your account. So, all you have to do is click on the pixel you wish to remove.
Phase 4: Select The Asset Associated With The Pixel
When you click on a pixel, its information will be presented next to the Pixels column. Then you’ll notice a row with three sections. Choose between People, Partners, and Connected Assets.
Phase 5: Remove The Linked Assets
The trash icon can be found at the bottom right of the Connected Assets button. When you click on it, the pixel will be deleted from your ads account.
Remove Facebook Pixel from your Website
The simplest way to delete Facebook Pixel is to simply remove it from your site. This means you won’t have to remove the Pixel from Facebook because it’s no longer transmitting your site to Facebook. It is critical to identify the exact pixels on your site’s header that correspond to the Pixel you want to remove, especially if there are numerous pixels. Looking up the Facebook Pixel ID is the most efficient approach to discover which Pixel should be removed.
There are four ways to incorporate the Facebook Pixel onto your website:
- A Web Developer must perform a manual installation.
- Pixel installation by hand using third-party plugins such as Insert Header and Footer.
- When you use one of Facebook’s CMS partners, such as WooCommerce, Joomla, WordPress, or Magento, you will experience Partner Integration.
- Google Tag Manager is used for manual installation.
Delete Facebook Pixel in Google Tag Manager
If you used Google Tag Manager to install the Facebook Pixel, you must remove it from the container. You must delete Google Tag Manager from the container that creates the Facebook event on your website. You don’t have to be the person who made it to get rid of the tags linked with this Pixel. If the individual who installed it followed the naming convention standards, you should be able to locate this device and block that it isn’t firing.
Simply press the tags to see if they match the Facebook Pixel base codes. Logging into Google Tag Manager will yield the tag. Log in to Google Tag Manager and select Tags from the left menu beneath your workspace. Select the Tag that corresponds to the Facebook Pixel. Then, press on the Facebook Pixel Tag you want to remove. If you tap the Tag, it will appear and you will be able to alter it. By tapping the three dots in the upper right area, you can pause or delete the Tag. If you decide to delete or suspend the Tag, save your changes to prevent it from firing again.
Put the Tag on pause first to verify it no longer fires before deleting it for the greatest results. You’ll be able to confirm that you didn’t delete the wrong Facebook Pixel Tag. You can also utilize the Facebook Pixel assistance to get the ID of the Facebook pixel you want to delete. You can also hire a Web Developer to assist you in removing the pixels.
Delete the Facebook Pixel from your source code

You have to include the Facebook tracking into your source code if you didn’t utilize Google Tag Manager, a plugin, or a partner integration like the Shopify Marketing feature.
Locate the Facebook code in your HTML header area. It is normally preceded by the HTML comment! Facebook Pixel Code -> and followed by the closing comment!- End Facebook Pixel Code ->. Save your work after removing the code.
Read more: Benefits Of The Facebooks Ad Library
Wrap-up
Inactive Facebook pixels might clutter your dashboard. This is why you must clean up by removing them from your dashboard. If you follow this instruction, you will be able to delete inactive Facebook pixels from your ads manager, business manager, and website.
You can connect your Facebook Pixel account to the WASK platform in addition to your Facebook Ads account to better manage its data. You may use Facebook Pixel to develop smart audiences, retargeting ads, and track crucial data about your visitors such as device and browser. Tracking conversions and conversion costs from ad traffic is simple, and increasing conversions by developing additional smart conversions is simple with WASK.




Thank you for your post. Much obliged.
Thanks J, stay tuned!